Saturday, August 31, 2013

Back to School: Study Tips

Hey guys! Today I will be sharing with you guys my Study Tips for those of you who are in school! For those of you who aren't in school, you guys can let me know what worked for you when you were in school!

Study Tips!

1) Read before class, specifically read the chapter the professor is going over before class.
I never did this before college, but this makes such a huge difference for studying! While you may not always understand what is going on in the chapter, it will give you a good idea of what the professor is going over and most likely you wouldn't need further clarifications!

2) Take notes during class and of the assigned readings.
In college or high school, you usually have three types of professors. One, a professor who teaches straight from the lectures. Two, a professor who teaches straight from the material of the book. And the unfortunate last one, a professor who does a combination of the above. With any of these type of teachers it is always a necessity to take notes during class and the assigned readings. There are a multitude of ways to take notes nowadays, cornell notes style, outline, straight on the powerpoint etc, but the most important thing is to take notes!

3) Review your notes after class!
To retain the knowledge that you learned in class, it is vital that you review your notes as soon as possible after class. If you have an hour or so break after that class, spend it wisely and look over the notes to reinforce the materials

4) Flashcards will be your best friends
Flashcards are a great tool for studying. They are fabulous for vocab words, procedures, multi-step processes etc. If you guys checked my Back to School Haul, you would've seen that the amount of flash cards I bought (and I will probably easily go through that amount!)

5) Use study groups if possible!
Study groups, as long as they are focused, are great to study difficult subjects! Everyone has their strengths and weaknesses in a subject, and you can most certainly find someone who will know the subject better than you in a certain area while you can also help them in a certain area.

6) Never be afraid to ask for help
There is nothing wrong in asking for help in school! For me, I have found that tutoring has helped a lot when I was tackling difficult subjects such as Organic Chemistry and Physics. If your school offers free tutoring, definitely check it out and see if they can help you out!

7) Become antiquated with your professor.
By going to office hours or staying after class and talking to your professor, you have a higher chance of understanding the material. Most professors I have encountered love to answer questions on the material that you are having issues with!

8) Do not procrastinate.
Procrastination will make it a lot harder for you to thoroughly understand and conceptualize the material. Yes, you may be able to do well for one exam, but will do you well on the cumulative final? I've been in the situation where I had to learn a whole semesters worth of material in less than a week because I procrastinated on each exam and didn't thoroughly understand the material. My advice, don't procrastinate. It will hurt you more in the end.

9) Manage your time wisely.
This may seem very simple, but I've learned in the past that managing your time is actually a chore. While it is always okay to watch TV, just make sure to limit the amount of TV you watch. Scheduling your schedule out the beginning of the semester will also allow you to look and see how much free time you have! I highly recommend you get a planner or use an electronic calender to help manage your time!

10) Remember to take breaks.
Taking breaks while studying is extremely helpful, you don't want to completely burn yourself out when you are studying the material. Taking breaks like going to the gym, watching an episode of TV, or just simply a 15 minute breather will work wonders when you study!


These studying methods are ones that I have learned that guaranteed me decent grades in classes :) With hard work and perseverance, classes are not that scary as what they are made out to be (including Organic, generally considered one of the hardest classes in college!) Good luck to everyone who will be in school :) Let me know what you guys suggest for me or any other students in the comment section below :D


Tuesday, August 27, 2013

Bargain Haul! Total Purchase Was Under $10!

As many of you do very well know, I kinda have a hard time sticking to Project 10 Pan throughout the summer. Now that school has started however, it should be a whole lot easier for me to stick to Project 10 Pan since I will have my head stuck in a book! I recorded this video with the help of my friend Jenny a couple of weeks ago, but now I finally got the chance to put it up online!  This was recorded a week after I got my wisdom teeth removed, which is the reason why my face was still swollen! Hope you guys don't mind so much! We recorded a couple of videos that day, so you will be seeing me with this outfit at least one more time :D

Basically, why I ended up hauling was because it I ended up with a lot of coupons/rewards/etc for CVS and Walgreens. We have a Sunday weekly subscription to the newspaper and there are times when I can snag pretty good deals and combine them with coupons...which is exactly what I did in the video I'm showing you today! I purchased 5 products between CVS and Walgreens and I made it under $10. If you are interested in seeing what I purchased and whatnot, feel free to keep on watching!


All the products I purchased were on my face that day, don't remember what other makeup products I used though, so I unfortunately can not list that in the description bar!

What products have you purchased lately? Let me know in the comment section below!


Monday, August 26, 2013

Back to School: My First Day of School Experience!

HAPPY MONDAY! So today will be me recapping my first day of school! I just entered my third year at University today and so I figured I'd share with you guys my experience in class! Of course, I totally forgot to snap pictures documenting my day... but regardless I had to share with you guys!

So I woke up today at 7 AMish, actually ate a legit breakfast (waffles with butter and some coffee) and then put on my makeup. Most mornings I usually forgo food and just have coffee. Some days I will go fancy and buy a nice Starbucks drink, but I was not going to start my year off with indulging in expensive food already!


I used the following products on my face today: Anastasia Beverly Hills Brow Wiz in Brunette, Anastasia Beverly Hills Clear Brow Gel, Bobbi Brown Corrector in Porcelain Peach, Korress Mattifying Primer, Lancome Dual Finish Powder in Matte Nu II, Maybelline the Falsies Flared Volum' Express Waterproof Mascara in Blackest Black, Neutrogena Healthy Defense Liquid Moisturizer SPF 50, Rimmel Show Off Lip Lacquer in Celestial, Urban Decay 24/7 Waterproof Eyeliner in Whiskey, and YSL Volupte Sheer Candy in Tangy Manderine. Sorry, that I don't have a

My first class of the day was Financial Accounting! For those of you who don't know, I'm attempting a Minor in Business and this class is a pre-requisite for the majority of the business classes I have left! To be honest, I didn't pay much attention in that class besides the fact that this class I will have to spend the most money for...which totally SUCKS. The amount of things I have to buy is absolutely ridiculous.

Wandered off to research for a bit and did an experiment before running to Analytical Chemistry. What I felt about this class can be pretty much summed into one tweet:
Essentially, that whole class was pretty much me retweeting, tumbling, instagraming, facebooking, snapchatting, and doing everything BUT pay attention in class. Am I on a good start already? Of course [/end sarcasm]. Best thing is, this class has attendance as a portion of your grade.

My friends and I had lunch at Panda Express. It was uberly delicious (even though it could never compare to what my mommy makes!) I had fried rice, orange chicken, and kung pao chicken. I also had Mango juice with me, so I had that lovely thing to drink :B

But then my friends attempted to stage an intervention.
Apparently my makeup collection has gotten too large...and they have gotten concerned. Seriously concerned. I don't think I'm not nearly as bad as they put me out to be... I actually use 95% of my stuff! The other 5% are misses that I don't know what to do about.... Though to be fair, my closet is lacking in clothes...while my makeup collection keeps growing and growing....

And that was pretty much my first day of school. If you are in school, let me know how your first day went! And if you aren't in school, just let me know how your day went! Post it in the comment section below, or hit me up on twitter!

Tuesday, August 20, 2013

Back to School Tips: 10 Things I Wished I Knew Before I Entered College

Hello everyone! Today's post is another Back to School post, this time revolving about the 10 Things I wished I knew when I entered College! I wanted to do some for middle school and high school, but its been SO long ago for me, that I'm not sure how relevant I can be (well not that long, but it feels like ages ago!). I hope that some of my tidbits can jog up some memories (hopefully more pleasant then unpleasant)! That being said, have fun reading what I have to say next!

10 Things I Wished I Knew Before Entering College!

1) Just because I did IB/AP/Honors does not give me an excuse not to study for school. You have no idea how much my grades could've been better if I have taken this to heart.
2) Choose your lab partners wisely on the first day of school. Friends may bee a good idea at first, but make sure its people who you know will actually do work.
3) Parking is awful on college campuses. Choose your classes wisely around that, or come to school a good 30 minutes before class so you can search for parking
4) Do have a stress reliever. Preferably a healthy one. Exercise is probably the most helpful stress relievers. If you have never exercised before now is the perfect time, seriously. Cause you do NOT want to burn out at the end of the semester or year...to the point that you can barely function. (Been there, done that, will hopefully NOT repeat that mistake!)
5) Professor's accents may make it difficult for you to learn in class. You may never understand what they are saying. For others, you can't keep a straight face in class. If that is either of the case, try to run away from the class (if possible). Can't tell you how embarrassing it is to comprehend things 20 minutes later because of a thick accent.
6) Ratemyprofessor.com will be your best friend to guarantee that you won't end up with an awful teacher. Word of mouth is also pretty reliable as well. Regardless, still study your butt off in the classes. Teachers may "seem" easy, but the material can still be rough. For example, my physics professor was very lax, but Physics 2 in college is nothing to joke about (I still to this day to not understand Kirchhoff Rule!).
7) You will probably end up spending a lot more money in college. Don't completely be freaked out with your credit card bill! Your parents however, will be freaked out! Brace yourselves young ones!
8) Just because you have friends from high school that goes to the same college with you doesn't mean that you will still stay friends. People do change, but props to those who are able to adapt to the changes and work things out!
9) As always, college stereotypes are not necessarily true. There is a huge diversity in college campuses that you will probably have never experienced before. Don't be afraid to meet with new people, learn about other cultures, and experience new things!
10) Bringing food after presentations (provided its a small class size) is always good to lighten up the mood of classmates. It is also good to make those kiddos pay attention to you more.

Now I know I'm only halfway through my college experience, but this is the advice I can give to you so far. For those of you who are wondering, where are the study advice?! Well, those will also be coming! Let me know if you have anything else to add in the comment section below or if you want to see anything expanded in this post. I'd be more than happy to rant about any of these in a blog post or video-- trust me, it'll be extremely amusing once you hear it out of my mouth ;)


Monday, August 19, 2013

Back to School: Makeup Touch Up Bag


Happy Monday everyone! I'm pretty much recovered from my surgery...YAY. Today I will be sharing with you guys what a normal person would be carrying if in their Makeup Touch Up Bag. I, of course, am not a normal person and I carry everything and anything with me to school where I do my makeup. For those of you wondering why that is the case, its simply because parking is awful on campus and I want to get a decent parking spot. For those of you interested in seeing what I would probably carry around in my makeup bag on a day to day basis, my 4th of July Travel Makeup Bag is the most accurate thus far. I also did a youtube video explaining in detail why I picked the products I picked, but if you guys can't stand my voice or don't want to listen to a 7 minute video, the products are listed down below! Apologies for the amount of pauses and uhhhs here, Pauline apparently can't stop using those. It will get better once I'm use to making videos and public speaking again. PROMISE. Bear with me for a couple of videos!

Products Featured:
Rimmel Stay Matte Powder in Transparent
EcoTools Retractable Kabuki Brush
Bath and Body Works Hand Sanitizer in Paris Amour
Neutrogena Healthy Defense Liquid Moisturizer SPF 50
CVS Oil Absorbing Sheets
Neutrogena Makeup Remover Towelettes
Bath and Body Works Lotion in Twilight Woods
Sephora Atomizer
Maybelline Baby Lips in Peach Kiss
Revlon Just Bitten Kissable Balm Stain in Honey
Rimmel Show Off Lip Lacquer in Apocalyptic

I hope you guys have a wonderful day :) I'll probably will be doing Back to School posts throughout this whole week to catch up! School for me starts up next week...haven't picked up my books yet or decided whether or not I want to drop classes yet...  Hectic semester season is going to start, but I have tons of things I have ready to post :D If I could post more than one post a day and get away with it, I would. 

What do you guys carry around for touchups? Let me know in the comment section below!

Sunday, August 18, 2013

TAG: How Much Does Your Face Cost?


Hey guys! So I saw this tag over at Sarah's amazing blog, Eyeshadowaddictsanonymous and I just simply had to do it! I simply did the makeup I wore to shadowing, although it was a no-makeup makeup day, I'm sure the price of my face is going to be pretty scary. For simplicity's sake, I am going to round up to the nearest dollar.

Face:
Bobbi Brown Corrector in Porcelain Peach - $23
Elf Studio Complexion Perfection - $3
Elf Studio Blush in Pink Passion - $3
Lancome Dual Finish Powder in Matte Nu II - $38
Lancome Teint Miracle Foundation in Buff 6W- $40
Revlon Photoready Cream Blush in Pinched - $10
Tarte 12 Hour Amazonian Clay Blush in Angelic - $9 (part of 2012 Holiday Collection)

Eyes:
Anastasia Brow Powder in Brunette - $23
Anastasia Clear Brow Gel - $22
Buxom Lash Mascara in Blackest Black - $19
Wet n Wild Eyeshadow Trio in Silent Treatment - $3

Lips:
Stila Lip Glaze in Kaleidoscope - $3 (part of 2011 Holiday Collection)
Victoria's Secret Very Sexy Lipstick in Whisper - $12
YSL Volupte Sheer Candy in Tangy Manderine - $32

Grand total: $250

Sad thing is that the total could be SO much worse. How do I justify my makeup spending habits you may ask? Because I actually use my makeup. If I didn't use makeup on a consistent basis I would feel awful for spending the money I spend. I can't bear to have things just sitting in my makeup organizer!

I tag everyone who would want to do this tag :D Let me know if you done this tag by linking it in the comment section below! :D


Wednesday, August 14, 2013

Update on Wisdom Teeth Recovery!


Hey guys! I decided to do a quick video today on how I am  recovering from wisdom teeth removal. I'm still not completely back to my 100% and I apologize for not being completely on top of things for my blog and YouTube channel, but hopefully within the next upcoming week or so things will get better!

Friday, August 9, 2013

Fantastic Fridays 8/9/13

Hey guys! Another week has gone by and as such, I'm recapping my week with a Fantastic Friday post! Unfortunately, I didn't do much this week because I got my wisdom teeth removed :/ Still in a decent amount of pain, swelling has gone down on one side of the face but not the other :/

Saturday: 8/3/13
Back to School Tips: 5 Products to Use When You Are Running Late

Sunday 8/4/13
Review: Clarins UV Plus HP Day Screen SPF 40

Monday 8/5/13
Back to School: Drugstore Makeup and Hair
- Had a microdermabrasion and facial today :D My face feels so good afterwards!

Tuesday 8/6/13
NOTD: Gradient Nails Using Essie's Peach Daiquiri and Bond With Whomever
- Got my wisdom teeth removed :/ They hurt so much now :/
Post Op Picture on Instagram!

Wednesday 8/7/13
Back to School: Tax Free Weekend Haul

Thursday: 8/8/13
- Posted Review of Elizabeth Arden 8 Hour Cream Sun Defense for Face SPF 50

How was your week? Let me know in the comment section below!


Thursday, August 8, 2013

Review of Elizabeth Arden 8 Hour Cream Sun Defense for Face SPF 50


Claims: Protection is one of the most enduring gifts you can give your skin. This oil-free, PABA-free, SPF 50 lotion shields your skin against UVA/UVB rays that can cause sunburn, skin cell damage and premature signs of aging. Lightweight but powerful.
Price: $30 (I bought this for about $10 at T. J. Maxx though...)
Size: 50 mL/1.7 oz
Where Can I Buy: Most high end retailers and potentially T. J. Maxx

Hey guys! So today I will be doing another Sunscreen review this time the product is the Elizabeth Arden 8 Hour Cream Sun Defense for Face SPF 50. I purchased this almost a year back and I have strong feelings about this product, and not necessarily the good strong feelings.


The packaging is relatively compact, the product comes out of the squeeze tube. As such, the product remains cleans, you would not need to worry about contaminating the product with your dirty hands.


The product has a very thick consistency initially. When applied to the face, I had to make sure to work the product into my face carefully so that all the product is distributed evenly. As I am running out of the bottle, the consistency of the sunscreen is a lot more liquidy, as seen by the picture above.

The formula for this product is extremely greasy, which makes it highly unpleasant for my combination/oily skin. This sunscreen is not ideal to wear underneath makeup, due to the greasiness of the product and the white cast it gives. This sunscreen is ideally used to wear by itself as a sunscreen when you are spending the majority of your day outside, such as going to the beach or park. I do not agree with the claim that this product is lightweight, I feel like this product is pretty heavy on my skin.

For those of you with extremely sensitive skin, I would not recommend you buy this. My baby sister broke out in hives when wearing this sunscreen, so be cautious if you want to use this product. I recommend swatching the product out on your hand and let it sit for a couple of hours to determine whether or not you are sensitive to this product!

The bottom line is, I would not recommend this product to be used under makeup. This product is suited to be worn by itself, not as a moisturizer underneath makeup. Due to its greasiness, I would not be repurchasing this product in the future. This product is probably better suited for dry skin or for people who are in less humid climates!

Have you guys tried this product? If so what do you think about it? Let me know what other products I need to review in the comment section down below!


Wednesday, August 7, 2013

Back to School: Tax Free Weekend Haul!


Hello everyone! Today I will be sharing with you what I got during our tax free weekend :) While makeup isn't included during tax free weekend, I did end up buying some beauty products that I needed to stock up on! So without further adieu, here is my haul!

School Supplies:


Index Card Boxes
I can not have enough of these! I abuse index cards so much, so these will be useful!

3 Subject College Ruled Paper
I go through a huge amount of paper, so 3 or 5 subject note books are the best for me! I just go for the generic kind, no need to spend extra money!

Ruled Index Cards
Sad enough, I'm almost positive that I will run out of these index cards by the end of the school year, if not the end of the semester!

Mini Stapler
Definitely a necessity in a pencil case! This cute pattern also makes it even more awesome!

Sharpie Pens
These a huge necessity for me, because I use these to write on really small test tubes in lab!

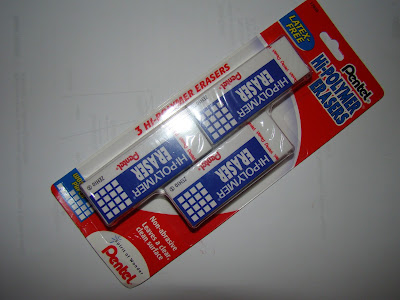
Pentel Hi-Polymer Erasers
I have a huge tendency to lose erasers, but these are one of the best that I've tried :D They actually erase, unlike some other brands....

Paper Mate Black Pens 
I can never get enough of black pens to hoard. These are pretty decent, they work well and don't bleed through paper!

 G2 Gel Pens
 These are my favorite, all time gel pens! I got the colorful packet so I can emphasize information in my notes! I still need to pick up their regular black and blue pens!

Pencil Case 
I always need something to carry my pencils/pens/everything else in! I just picked up a generic kind :)

Scissors
Regardless of what grade you are in, scissors are useful for a projects and whatnot! I picked these up cause I have a little sister, don't want to poke her with them ;)

Bic Mechanical Pencils
I rarely use pencils nowadays, but these are pretty decent! I keep them around for bubbling exam sheets and for math problems :D

Pentel 0.7 mm Lead and Eraser Kit
By having mechanical pencils, one would also need one of these to refill the lead and for when erasers on those pencils die!

Paper Mate Black and Blue Pens
I just realized how many pens I bought! These are probably my least favorite (probably because there are others that are more comfortable), but they work just fine. 

Sharpie Highlighters
Highlighters are a necessity when you want to emphasize details and for note taking!


Paper Mate Blue Pens 
Another batch of Paper Mate Pens! This time they are blue! A girl has to switch it up once in awhile now right!

5 Rain Gum
Gum, for me, is a necessity to have when I'm studying or during exam times. So I'm starting to stock up on my gum stash!

Makeup:


Almay Oil-Free Makeup Remover Wipes
For when you are in a rush, these makeup remover wipes work miracles :D  

Nars Sample Smudge Proof Eyeshadow Base
Received as a 100 point perk at Sephora when I bought my sister an atomizer!

Neutrogena Oil Free Makeup Remover
I'm always in need of a new makeup remover, and I always go back to this one!

Philosophy Sample Microdelivery Exfoliating Face Wash
Received this as a sample from Sephora, can't wait to try this out!

Real Techniques Blush Brush
Been dying to try the Real Techniques line for some time! I'e already tried this brush and washed it! Got a good impression out of it :D Review shall be up for all these brushes eventually!

Real Techniques Core Collection Kit
Talk about a beautiful collection here. In this kit, you get the Buffing Brush, Contour Brush, Pointed Foundation Brush, and Detailer Brush. Can't wait to try them out!

Real Techniques Expert Face Brush
Everyone raves about this brush for foundation, so I figured I would have to try out. Got a good impression already :D Must buy more when Ulta has a sale and coupons :D

I still have to pick a couple more supplies for school, but this is what I have right now :D What are your back to school essentials? What did you guys purchase recently? :Let me know in the comments below!

Tuesday, August 6, 2013

NOTD: Gradient Nails Using Essie Peach Daiquiri and Bond With Whomever


Hey guys! So today I will be showing you what one of my best friends Jenny, lennyjong on Instagram, did for me. We attempted to do a gradient nail look, and the outcome is as seen above. She used Essie's Peach Daiquiri and Bond With Whomever

From left to right: Peach Daiquiri, Bond With Whomever


How to Achieve this Nail Gradient Look!
1) File and buff your nails out to the shape that you want it to be
2) Using a cosmetic wedge sponge, do a horizontal stripe about the size of a nail on the tip of the sponge using Peach Daquiri. Then, underneath the first stripe, do another horizontal stripe using Bond With Whomever
3) Dab the sponge on your nail, trying to pack as much color on as possible. Let the nail polish dry and repeat step 2 and 3 for each individual nail until you have reached the desired opacity (she did it 4-6 times for each nail).
4) Add a top coat so smooth out the roughness of the nails.

Overall, from a distance I do really like the nails. This was the first time Jenny and I tried gradient nails and we both agreed that it was a bust. Using top coat did not smooth out my nails that resulted from sponging on the nail polish. There were bits of sponge that were left on the nail. If the nail polish wasn't opaque (like Bond With Whomever), it made the task extremely difficult to get to the color payoff I wanted. Lastly, we did lose a lot of product when we used sponges. The results were a tad bit better for my sister when we applied a full coat of nail polish first and then sponged the other nail polish on. While the color payoff and smoothness of the nail had improved, there wasn't as strong as a gradient as using the sponge method. As such, I probably won't be getting my nails done again using the sponge to achieve a gradient effect.

What do you think of this look? Have you achieved a gradient effect successfully? Let me know in the comment section below!


Monday, August 5, 2013

Back to School: Drugstore Makeup and Hair for First Day of School


Hello ladies! Today I am doing one of three back to school makeup and hair looks! Today is a more feminine, girly, and polished look. I am using all drugstore products for my makeup and hair! I hope you guys enjoy reading this blog post!

Makeup:


Face: 
Covergirl Outlast Stay Fabulous 3 in 1 Foundation in Medium Beige
Elf Studio Complexion Perfection
Maybelline Dream Lumi Touch Concealer in Buff
NYC Bronzer in Sunny
Rimmel Stay Matte Powder in Transparent
Wet n Wild Blush in Pearlescent Pink


Eyes:
Elf Studio Eyebrow Kit in Medium
Jordana Best Lash Extreme Volumizing Mascara in Black
Maybelline 24Hr Color Tattoo in Bad to the Bronze
Maybelline MasterPrecise Liquid Eyeliner in Black
Physician's Formula Matte Eyeshadow Quad in Canyon Classics
Rimmel Scandaleyes Kohl Kajal Waterproof Eyeliner in Nude
Wet n Wild Fergie Take the Day Eyeshadow Primer


Lips: 
Jordana Easy Liner in Baby Berry
Milani in Nude Creme
Revlon Colorburst Lipgloss in Peony

Eye Makeup Walkthrough:
1) Primed the eyes using the Wet n Wild Fergie Take the Day Eyeshadow Primer
2) Filled in my eyebrows using Elf Studio Eyebrow Kit in Medium
3) Applied Maybelline 24Hr Color Tattoo in Bad to the Bronze for a base for my eyemakeup.
4) Highlighted my inner corner and underneath my browbone using #1 from Physician's Formula Matte Eyeshadow Quad in Canyon Classics. I then used #2 all over my eyelid, and defined my crease and outer V using #3.
5) Used Maybelline MasterPrecise Liquid Eyeliner in Black to create a cat eye. I then used Rimmel Scandaleyes Kohl Kajal Waterproof Eyeliner in Nude on my waterline.
6) Applied two coats of Jordana Best Lash Extreme Volumizing Mascara in Black 


Hair: 

My hair look was created by my best friend, Jenny. She doesn't have a blog, but if you guys want to check her out on Instagram, her profile is here. She will be creating all three of my hair looks to accompany the three makeup looks I will be posting. Today's hair features a Braided Half Up Hairstyle. 


To Create this Braided Half Up Hairstyle:
1) Section the top half of your hair (from temple to temple) into three parts (a top and two side sections). Leave the bottom half untouched.
2) Start by French Braiding your side sections until you get to the back. Then, stop collecting hair and finish braiding normally til you reach the ends and temporarily secure with hair clips. Repeat for the other side section.
3) To create the final braid, the three strands will consist of the left side section, the top that was set aside, and the right side section. Remove the hair clips holding the two side braids and braid the three sections normally until you reach the ends of your hair. Secure with an elastic band.
4) Tug on the braid to create a more loose and full hairstyle.
5) Because I already had second day hair, I redefined my curls using my NuMe 19mm Magic Wand.
6) Add accessories such as hair pins or bows to glam up the look.    


How did you guys like this look? What would you wear for the first day to school? Let me know in the comment section below!

Related Posts Plugin for WordPress, Blogger...